Greenhouse Terrarium DIY

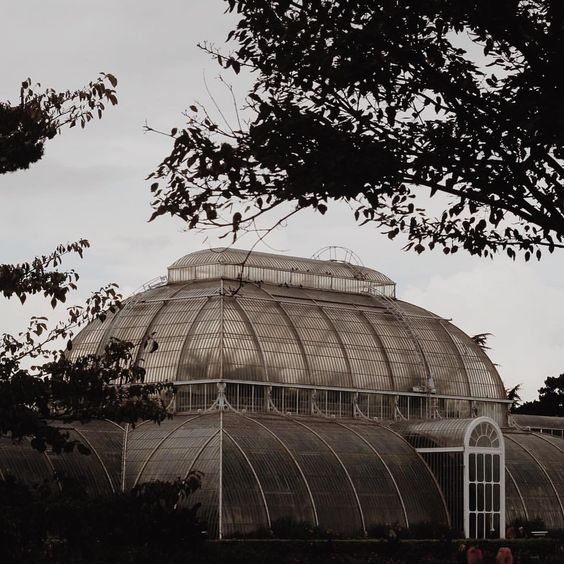
After a recent visit to Kew Gardens, I felt particularly inspired to try and incorporate more of the natural world within my home. Living in London, it’s often hard to escape from the hustle. I’ve been gradually introducing more and more greenery into my flat to try and bring some serenity to the space- however have recently ran out of places to put them all. I’ve been eyeing up this sweet little terrarium greenhouses from ikea for some time now, but they were always a little too plain for my taste. Walking through the victorian greenhouses at Kew in utter admiration of the ornate and intricate structures, I knew exactly what I wanted to do.
As some of you may know, I’m a huge advocate for sustainability and breathing new life into discarded items, so I personally purchased the greenhouse secondhand from eBay. So needless to say, if you already have one lying around the place or can find one secondhand that’s an added bonus!


The upcycle itself is quite simple, though you may need to practise a little before you commit to a design.
All you need is:
-Your greenhouse
-white air drying modelling clay
-superglue
-sculpting tools (you don’t need anything professional, I personally just used an old nail and some pins)
-patience (and maybe a good podcast/ audiobook)
Part one: the base

Part two: the details
Before you start adding on the details, thoroughly plan out your design. You can either quickly sketch this out if you’re going based on your imagination, or, as I did, use a picture reference to base your design on. Then, slowly start moulding out shapes and sticking the pieces in place as explained below:
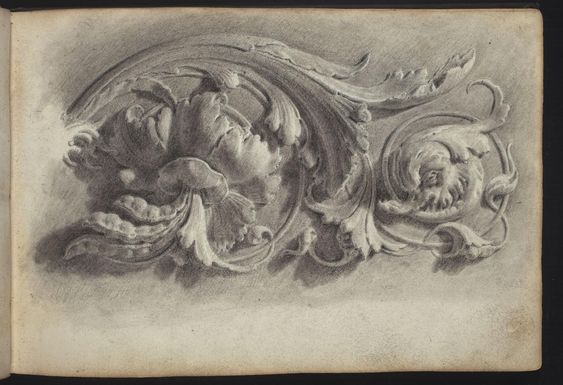
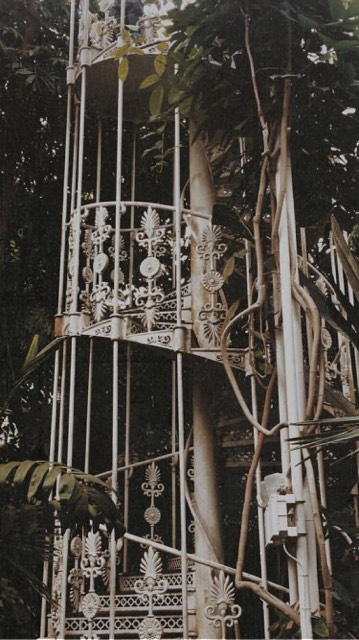
I loosely based my design on this drawing, combining it with elements from the greenhouses in Kew Gardens.


Break the design down into stages, gradually adding on details and securing with a little dab of superglue if you need. This is where you'll need a good cup of tea and something to listen to, as it’s a long process but super rewarding in the end. Once you’re done, leave it somewhere safe to dry for at least a few days. You can also spray paint/ glaze it if you need. I personally left it, but this is down to personal taste.
And that’s it guys! I hope you enjoyed this little DIY project and do tag me on Instagram or leave a comment if you decide to try it out yourselves.
Love,
Ffion